
Sound and Lighting
Part of Lighting and camera setup for office shoots: shot checks
Filming reflective products without distracting glare
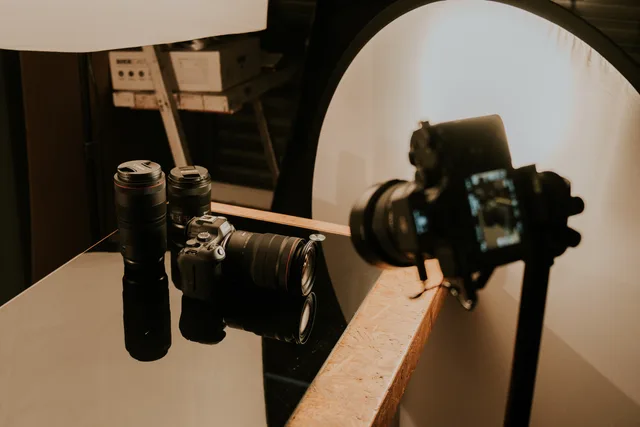
A glossy package or metal product reflects the room, light source and camera.
A glossy package or metal product mirrors the room, the light source and the camera. The aim is not to remove every reflection; some reveal shape and finish. Remove reflections that hide a label, blow out a detail or show distracting objects.
Start with a clean product and a simple background. Adobe recommends a controlled environment, good lighting and a clean background. Place a softbox, scrim or diffusion panel between the light and product; a diffuser larger relative to the product creates softer, more gradual highlights. For a very small shiny item, a light tent can surround it.
One reflective-glass setup used a 31 × 47 in Glow EZ lock softbox at an angle, with Rosco Cinegel #3000 Filter Tough Rolux diffusion paper (48 in × 25 ft) hung from a C-stand boom arm. Wrinkles in nylon diffusion material can show up in reflections; paper diffusion avoids that problem.
On a smooth surface, the angle of incidence equals the angle of reflection. If the light source appears in the lens, move the light off that reflection path, or shift the camera or product until the highlight no longer covers the label or fine detail. Look through the camera as you move a bright light around the product; stop when the glare clears but the product is still well lit.
Start with the light to the side, not directly in front. You can also aim a light at a white ceiling, wall or large piece of white foam core to turn that surface into a broad light source. Use a white or matte reflector to fill shadows without creating a new glare point.
A strip of black foam core can block light that would otherwise create an unwanted reflection. Use it as a flag, then check the frame to see whether the hotspot is gone without losing useful shape.
Rotate the product and camera in small increments, watching the final frame. Moving the reflection’s source is often easier than changing exposure.
Check the important details: brand, colour, texture and any claim printed on the product. A circular polarising filter on the lens can reduce surface reflections; rotate it while looking through the camera to find the useful position. It will not work on every material and can change how a finish looks, so test it rather than assuming it is the answer.
Record a short turn or handling sequence. Watch for crew, windows and coloured walls appearing in the product. If a reflection communicates the intended finish without hiding information, keep it; the viewer should be able to judge the item accurately.
How to Film Reflective Products Without Distracting Glare
- Prepare a clean product and simple backgroundUse a controlled environment with minimal distractions; ensure the product is free of smudges or fingerprints.
- Position lights at an angle, not directly in frontPlace softboxes or diffusion panels to create soft, gradual highlights; avoid direct frontal lighting that causes harsh reflections.
- Adjust light or camera position to eliminate glareMove the light, camera, or product so the reflection no longer covers labels or fine details; use the principle that angle of incidence equals angle of reflection.
- Use a black foam core flag to block unwanted reflectionsPlace a strip of black foam core between the light source and the reflective surface to prevent hotspots without affecting overall lighting.
- Rotate product and camera incrementally to reposition reflectionsSmall adjustments can shift the reflection away from critical areas without changing exposure or lighting setup.
- Test a circular polarising filter on the lensRotate the filter while viewing through the camera to reduce surface glare; note it may alter finish appearance—test before final use.
- Record handling or turn sequences and check for distractionsReview footage for reflections of crew, windows, or coloured walls; retain reflections that show finish but remove those obscuring information.
Using a Circular Polarising Filter
- ProsReduces surface reflections on glossy or metallic products; improves clarity of labels and textures.
- ConsMay alter the appearance of finishes (e.g., makes metal look dull); does not work on all materials (e.g., plastic with certain coatings).